
Disable startup programs in Windows 10
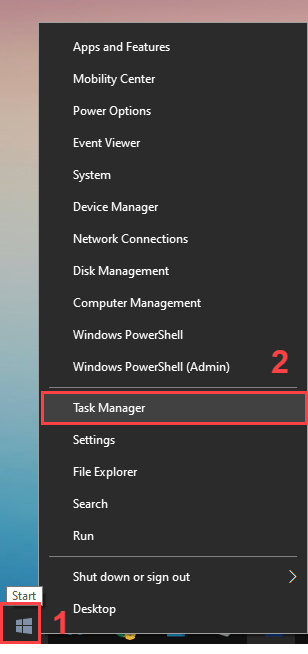
1. Open up the Task Manager by right-clicking on the Windows key and choosing Task Manager. Alternatively, you can press CTRL + Shift + Esc keys at the same time
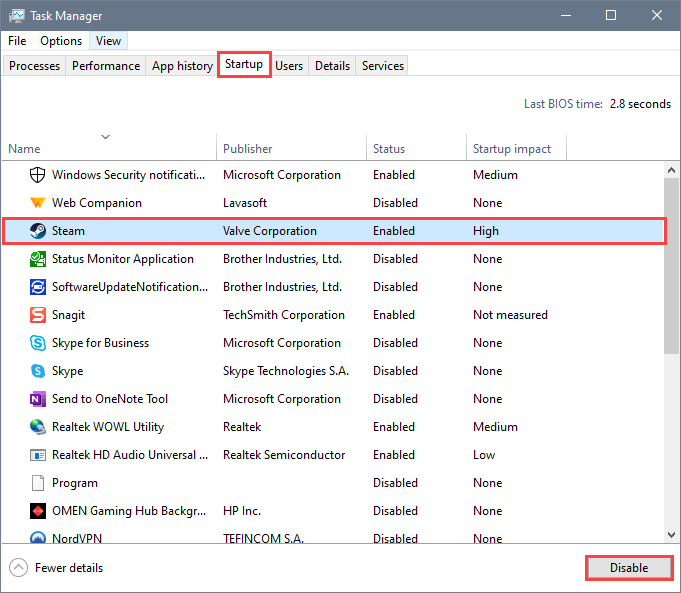
2. Navigate to the Startup tab at the top
3. Click on the program you want to disable, then click on Disable on the bottom-right corner
Add startup programs in Windows 10
1. Open up the Task Manager by right-clicking on the Windows icon and choosing Task Manager. Alternatively, you can press CTRL + Shift + Esc keys at the same time
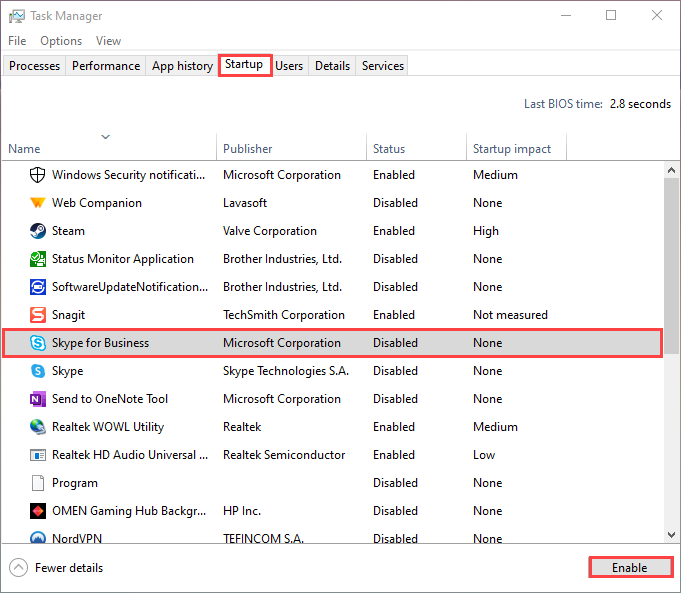
2. Navigate to the Startup tab at the top
3. Click on the program you want to enable, then click on Enable on the bottom-right corner
If you don’t see the desired program in the Startup list in Task Manager, you will need to add the program to the Startup Folder in Windows.
Do the following:
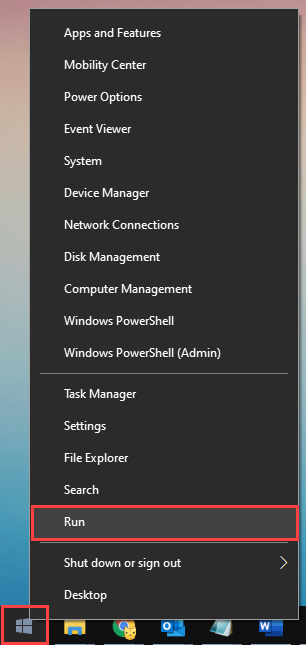
1. Press the Windows key + R to open the run dialog box. Alternatively, you can right-click on the Windows key and select Run
2. Type in shell:startup and press OK

3. Create a new shortcut by right-clicking on whitespace in the Startup folder and choosing New > Shortcut
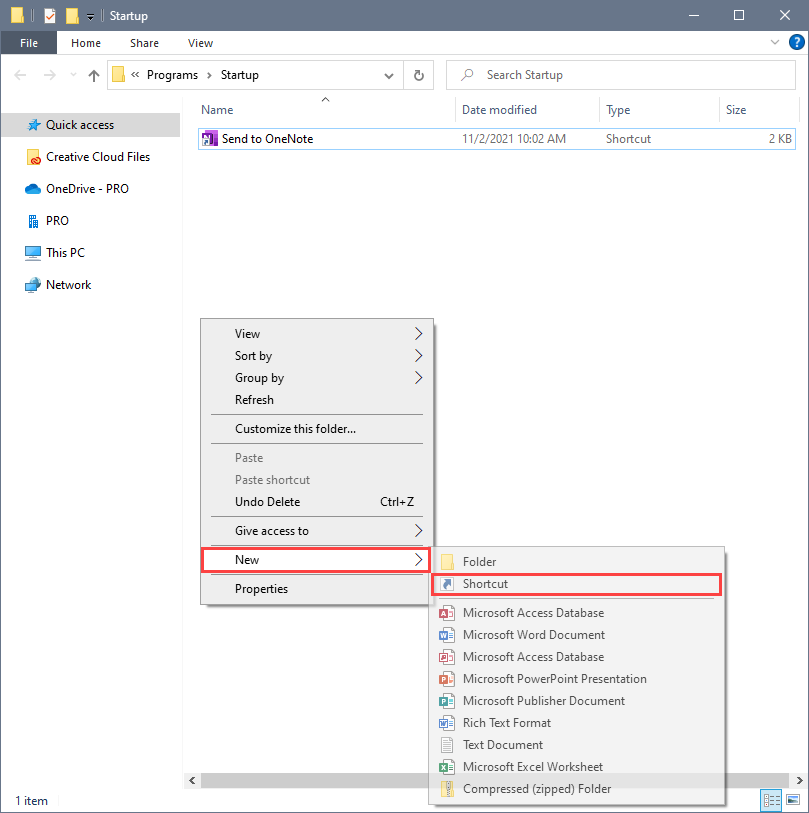
4. Click Browse to find the program in your computer
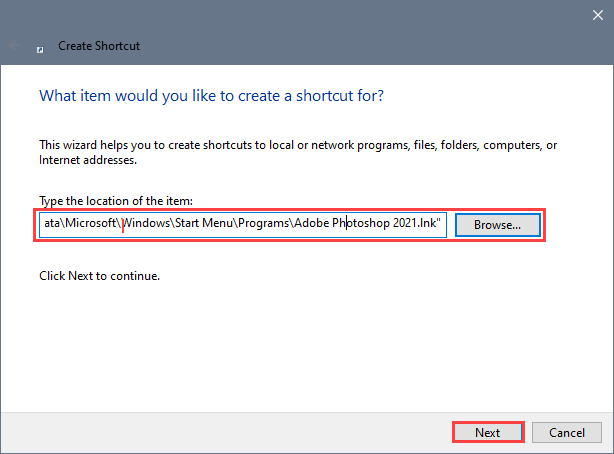
If you can’t easily find the program, try searching for the program name by clicking on the Windows icon and start typing the name. Once found, click on Open file location. You can find the path to the shortcut file at the top of the page.
5. Click Next and Finish
6. Restart your computer to see the changes and verify the program is starting automatically
Need Support?
Can't find the answer you're looking for?